1. 前言
单点登录是建立在OAuth2的授权码模式的基础上的。
其主要流程为:
客户端1:
- 客户端1正常访问业务,由于没有登录,因此重定向到登录接口
- 客户端1请求登录。login中通过
@EnableSso创建的spring-security过滤器链拦截登录请求,重定向到授权服务器获取授权码
- 授权服务器重定向至登录界面,登录完成后重定向到授权码接口继续授权
- 授权服务器授权完成后重定向到客户端1登录接口
- 客户端1携带授权码code再次访问/login接口,这次有了code,则不再请求授权码而是请求token
- 授权服务器校验code并返回token
- 客户端1拿到token后调用获取用户信息的端点接口请求用户信息
- 完成登录
- 最后重定向请求业务接口
这就完成了一次完整的单点登录
客户端2:
- 客户端2正常访问业务,由于没有登录,因此重定向到登录接口
- 客户端2请求登录。也向授权服务器重定向请求授权码
- 授权服务器接收到登录请求后由于用户已经登录了,服务器有了session,因此跳过了登录,直接授权授权完成后重定向到/login
- 客户端2拿到code继续请求/login,请求token
- 授权服务器校验code返回token
- 客户端2拿到token调用获取用户信息接口
- 完成登录
- 重定向到业务接口
可以看到整个流程就第三步发生了变化,已经登录过了则不需要登录,因此实现了只需要在一个客户端登录的单点登录场景。
有了这个逻辑思路,才好调试单点登录的源码否则看起来太吃力了
具体逻辑分析,查看松哥的文章
Spring Boot+OAuth2,一个注解搞定单点登录!
2. 项目搭建
2.1. 认证服务器+资源服务器
2.1.1. pom依赖
1
2
3
4
5
6
7
8
9
10
11
12
13
14
| <dependencies>
<dependency>
<groupId>org.springframework.cloud</groupId>
<artifactId>spring-cloud-starter-oauth2</artifactId>
</dependency>
<dependency>
<groupId>org.springframework.cloud</groupId>
<artifactId>spring-cloud-starter-security</artifactId>
</dependency>
<dependency>
<groupId>org.springframework.boot</groupId>
<artifactId>spring-boot-starter-web</artifactId>
</dependency>
</dependencies>
|
2.1.2. 配置
2.1.2.1. 认证服务器配置
认证服务器主要配置客户端的相关信息
如果资源服务器也在这里的话,那么还需要配置资源服务器注解,只需要开启即可
1
2
3
4
5
6
7
8
9
10
11
12
13
14
15
16
17
18
19
20
21
22
23
24
25
26
27
28
29
30
31
32
33
34
35
36
37
38
39
40
|
@EnableAuthorizationServer
@EnableResourceServer
@Configuration
public class ServerConfig implements AuthorizationServerConfigurer {
@Autowired
PasswordEncoder passwordEncoder;
@Override
public void configure(AuthorizationServerSecurityConfigurer security) throws Exception {
}
@Override
public void configure(ClientDetailsServiceConfigurer clients) throws Exception {
clients.inMemory()
.withClient("sso-client1")
.secret(passwordEncoder.encode("123456"))
.scopes("all")
.authorizedGrantTypes("authorization_code")
.accessTokenValiditySeconds(3600)
.autoApprove(true)
.redirectUris("http://localhost:8081/login")
.and()
.withClient("sso-client2")
.secret(passwordEncoder.encode("123456"))
.scopes("all")
.authorizedGrantTypes("authorization_code")
.accessTokenValiditySeconds(3600)
.autoApprove(true)
.redirectUris("http://localhost:8082/login");
}
@Override
public void configure(AuthorizationServerEndpointsConfigurer endpoints) throws Exception {
}
}
|
2.1.2.2. 用户配置
因为资源服务器也配置在了这里,一定注意加@Order提升配置的优先级,否则登录优先走资源服务器导致登录失败
1
2
3
4
5
6
7
8
9
10
11
12
13
14
15
16
17
18
19
20
21
22
23
24
25
26
27
28
29
30
31
32
33
34
35
36
37
38
|
@Configuration
@Order(1)
public class SecurityConfig extends WebSecurityConfigurerAdapter {
@Bean
PasswordEncoder passwordEncoder() {
return new BCryptPasswordEncoder();
}
@Override
public void configure(WebSecurity web) throws Exception {
web.ignoring().antMatchers("/login.html", "/css/**", "/js/**", "/images/**");
}
@Override
protected void configure(HttpSecurity http) throws Exception {
http
.requestMatchers().antMatchers("/login").antMatchers("/oauth/authorize").and()
.authorizeRequests().anyRequest().authenticated().and()
.formLogin().and()
.csrf().disable()
;
}
@Override
protected void configure(AuthenticationManagerBuilder auth) throws Exception {
auth.inMemoryAuthentication()
.withUser("javaboy")
.password(passwordEncoder().encode("123"))
.roles("admin");
}
}
|
资源服务器就配置好了,一定注意拦截链路的配置和提升配置优先级
2.1.3. 用户信息接口
这里就是一个普通的获取用户信息的接口,可以自己定义
1
2
3
4
5
6
7
8
| @RestController
public class UserController {
@GetMapping("/user")
public Principal getCurrentUser(Principal principal) {
return principal;
}
}
|
2.2. 客户端搭建
2.2.1. 依赖
其实授权服务器、资源服务器、客户端的依赖都是一样的,只是启动的注解不一样而已
1
2
3
4
5
6
7
8
9
10
11
12
13
14
| <dependencies>
<dependency>
<groupId>org.springframework.cloud</groupId>
<artifactId>spring-cloud-starter-oauth2</artifactId>
</dependency>
<dependency>
<groupId>org.springframework.cloud</groupId>
<artifactId>spring-cloud-starter-security</artifactId>
</dependency>
<dependency>
<groupId>org.springframework.boot</groupId>
<artifactId>spring-boot-starter-web</artifactId>
</dependency>
</dependencies>
|
2.2.2. 配置
主要注意@EnableOAuth2Sso开启单点登录。
开启后登录的时候就不会走spring-security的默认登录,会用OAuth2ClientAuthenticationProcessingFilter替换OAuth2ClientAuthenticationProcessingFilter
1
2
3
4
5
6
7
8
| @Configuration
@EnableOAuth2Sso
public class ClientSecurityConfig extends WebSecurityConfigurerAdapter {
@Override
protected void configure(HttpSecurity http) throws Exception {
http.authorizeRequests().anyRequest().authenticated().and().csrf().disable();
}
}
|
2.2.3. 配置文件
配置文件主要配置客户端信息和Oauth2重要的3个地址
1
2
3
4
5
6
7
8
9
10
11
12
13
14
15
| server:
port: 8082
servlet:
session:
cookie:
name: client2
security:
oauth2:
client:
client-id: sso-client2
client-secret: 123456
user-authorization-uri: http://localhost:8080/oauth/authorize
access-token-uri: http://localhost:8080/oauth/token
resource:
user-info-uri: http://localhost:8080/user
|
新的客户端只需要修改端口和客户端信息就可以了
2.2.4. 测试接口
这个自己写接口测试就行了,只要在权限控制内就可以
1
2
3
4
5
6
7
8
9
10
11
12
13
14
| @RestController
public class HelloController {
@GetMapping("/hello")
public Object hello(){
SecurityContext securityContext = SecurityContextHolder.getContext();
Authentication authentication = securityContext.getAuthentication();
return authentication;
}
@GetMapping("/")
public String index() {
return "index";
}
}
|
3. 页面流程解析
运用了大量的重定向,主要看页面重定向的逻辑
客户端client1访问流程
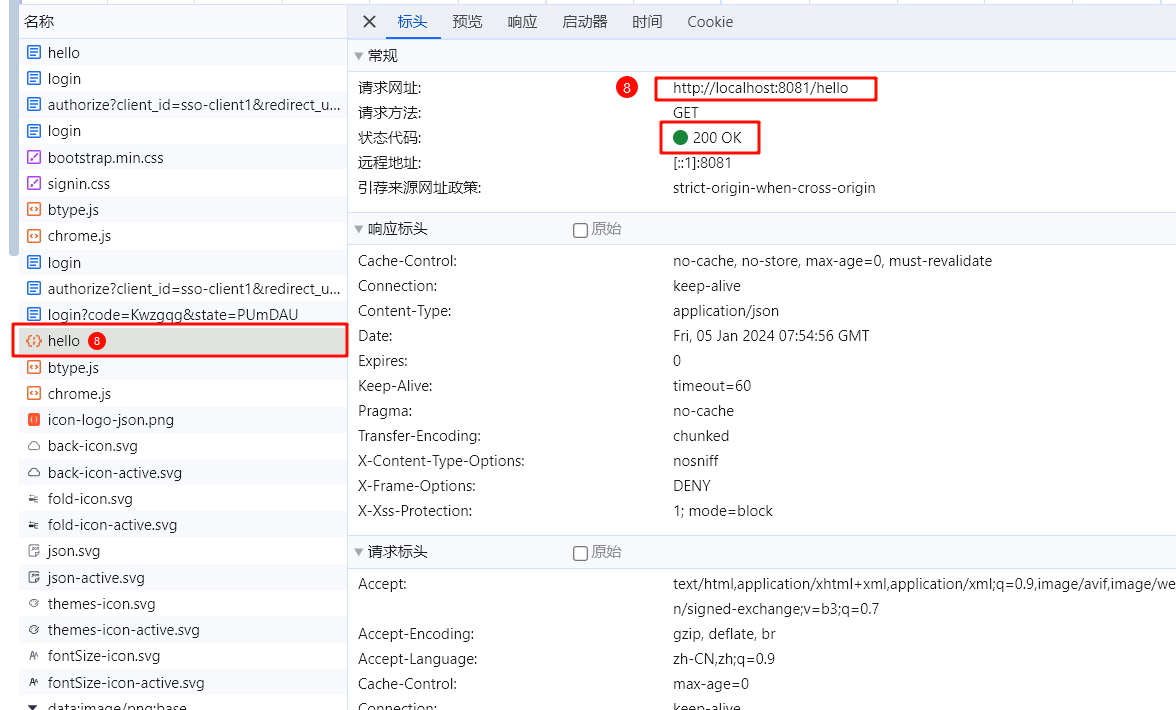
- 访问
localhost:8081/hello,重定向到client1的登录页面(此处的页面是在访问完成第4步时出来的)
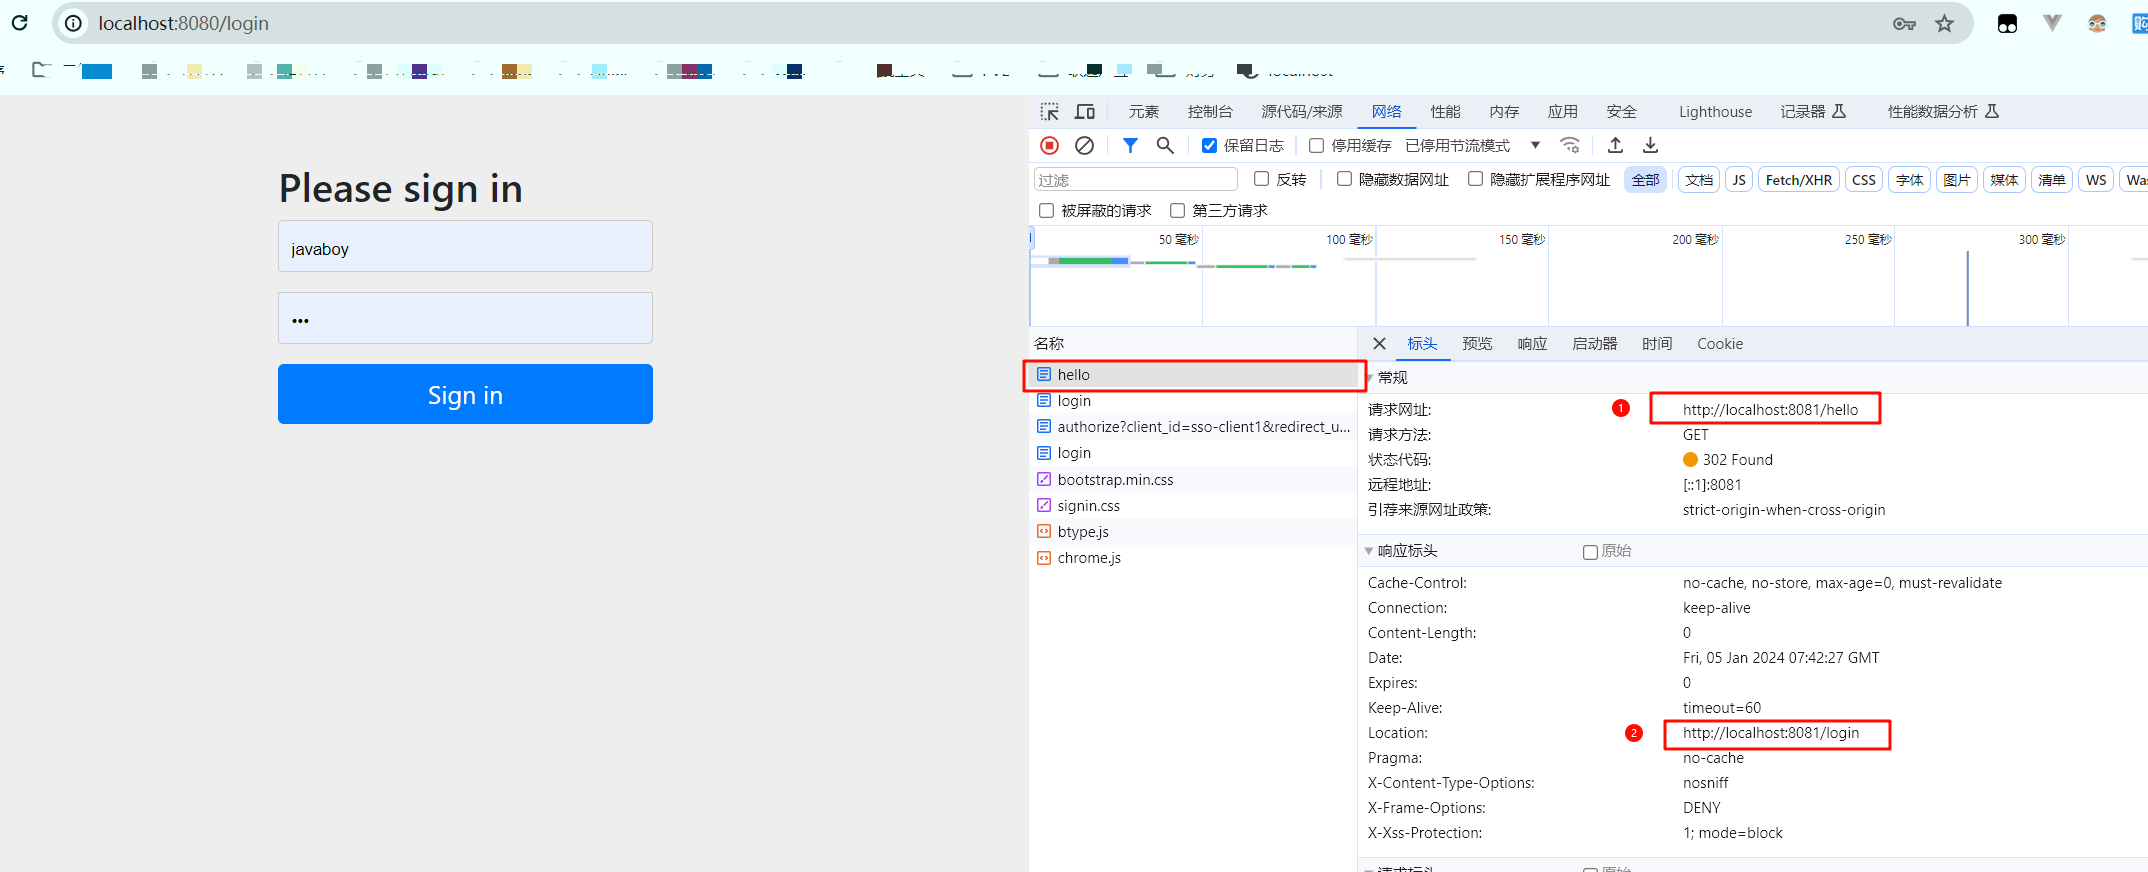
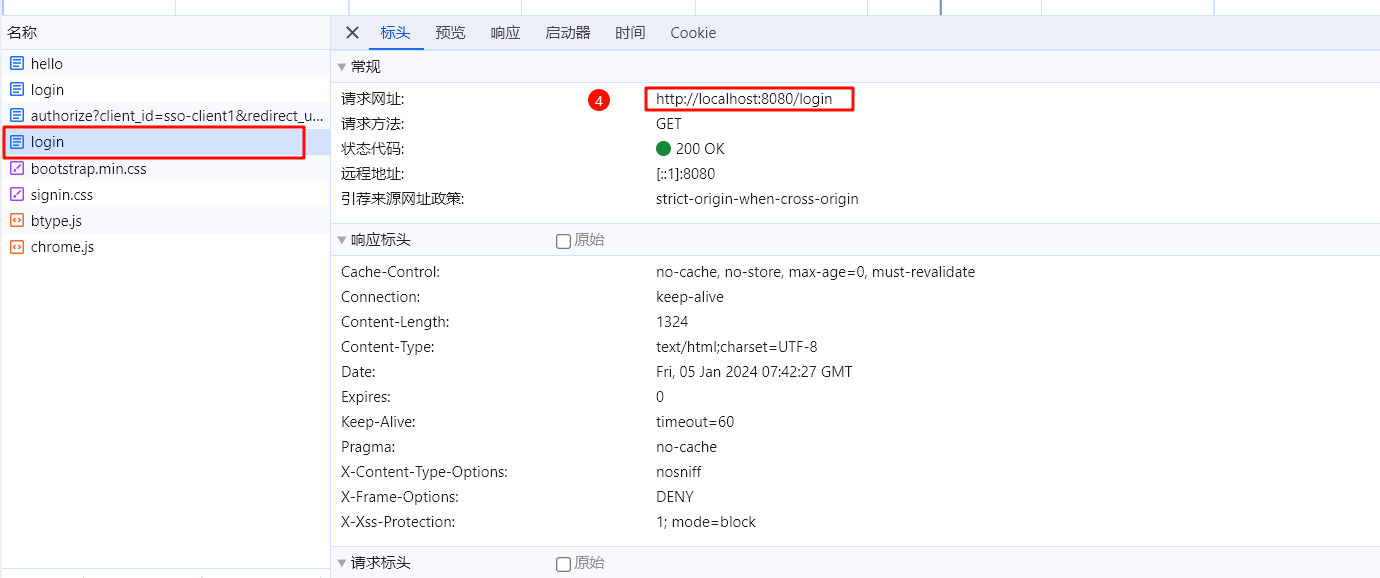
- client1访问登录,重定向到授权服务器获取授权

- 授权服务器需要获取授权,重定向到授权服务器的登录页

- 获取授权服务器登录页
- 登录之后又重定向到授权页
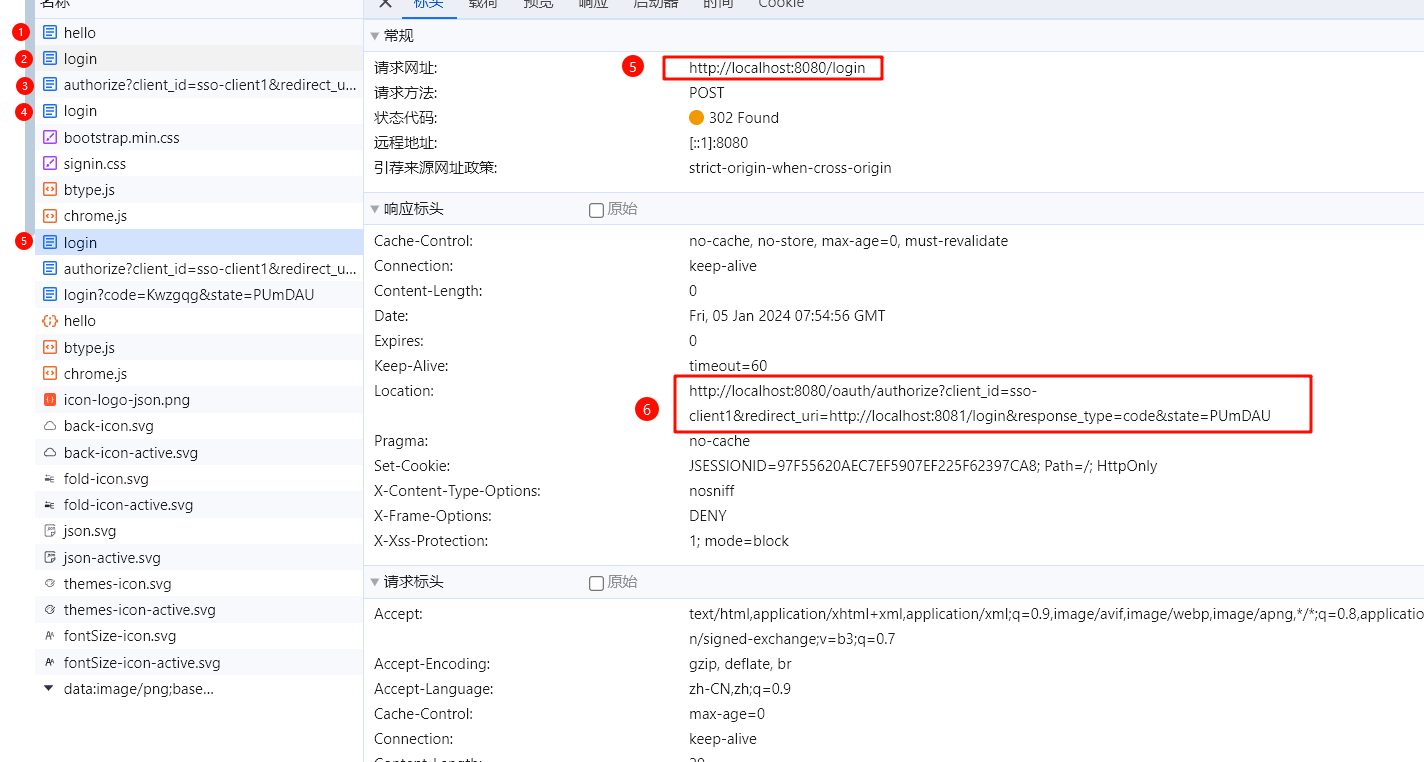
- 请求授权,授权完成后又重定向到client1的登录请求接口
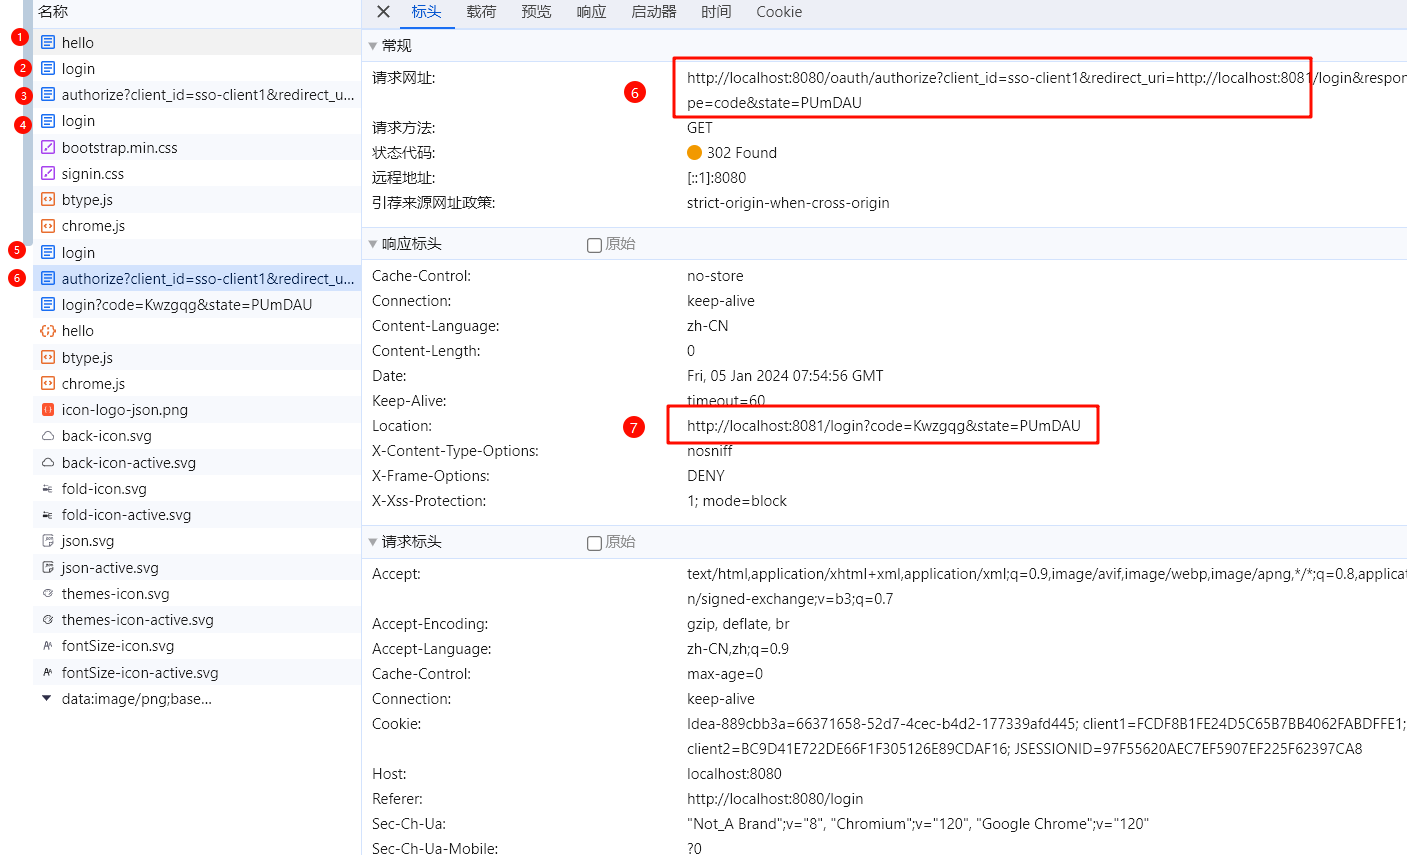
- 登录请求拿着code执行登录,再重定向到最开始的访问接口

- 执行client的 /hello(已授权),返回200,即返回业务数据
客户端client2访问流程
- 访问/hello,重定向到login
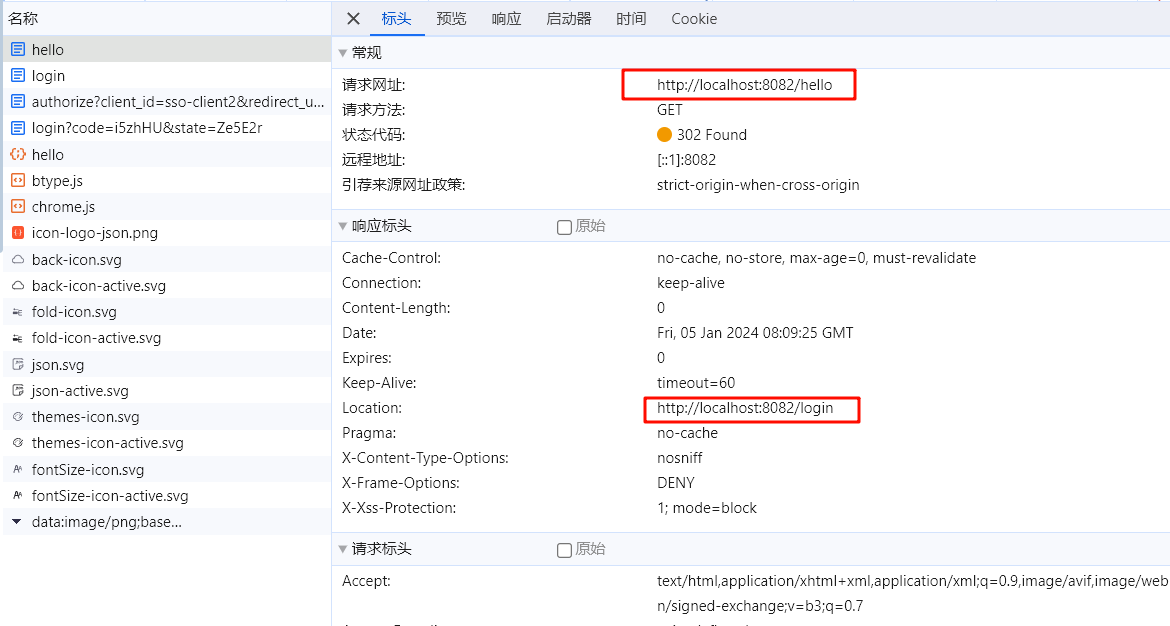
- 访问login,重定向到授权服务器授权
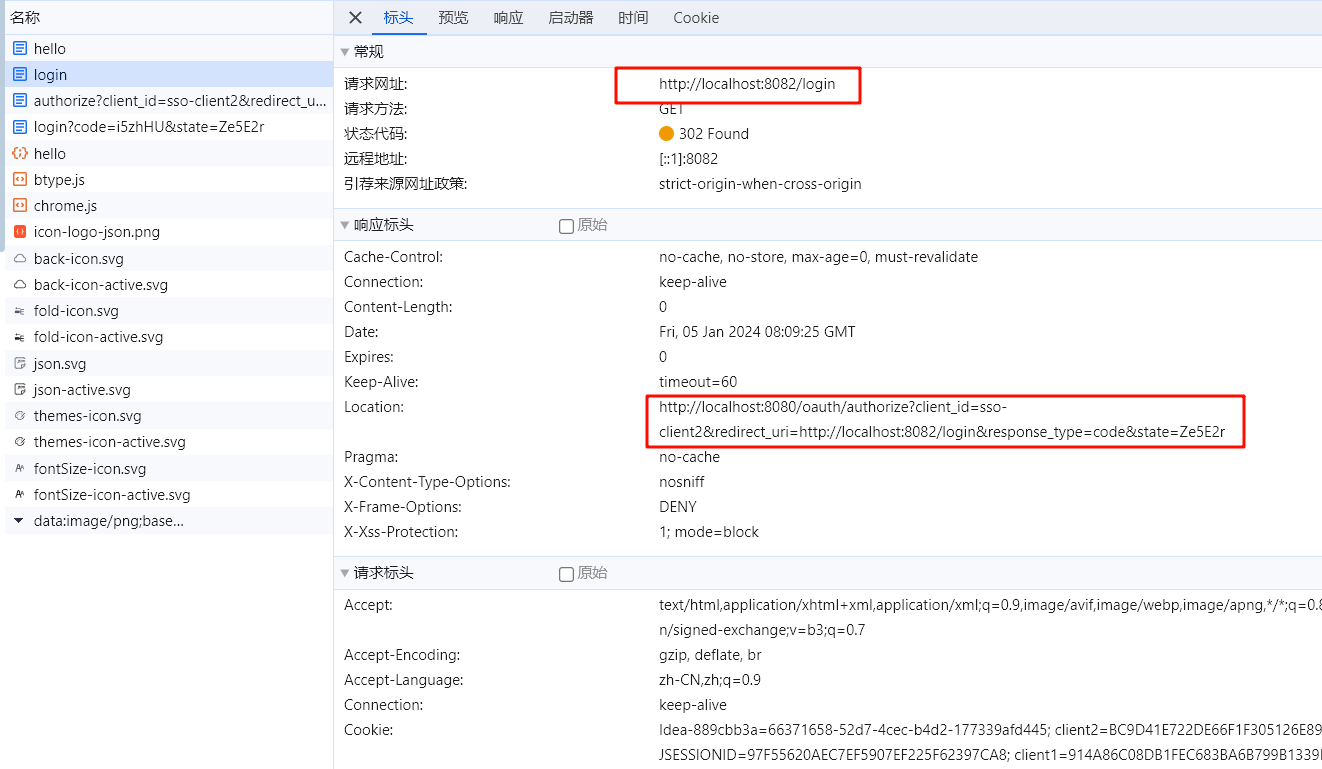
- 访问授权服务器授权接口,此处不再重定向到登录页而是client2的登录接口了,因为已经登录了就不用再登录了
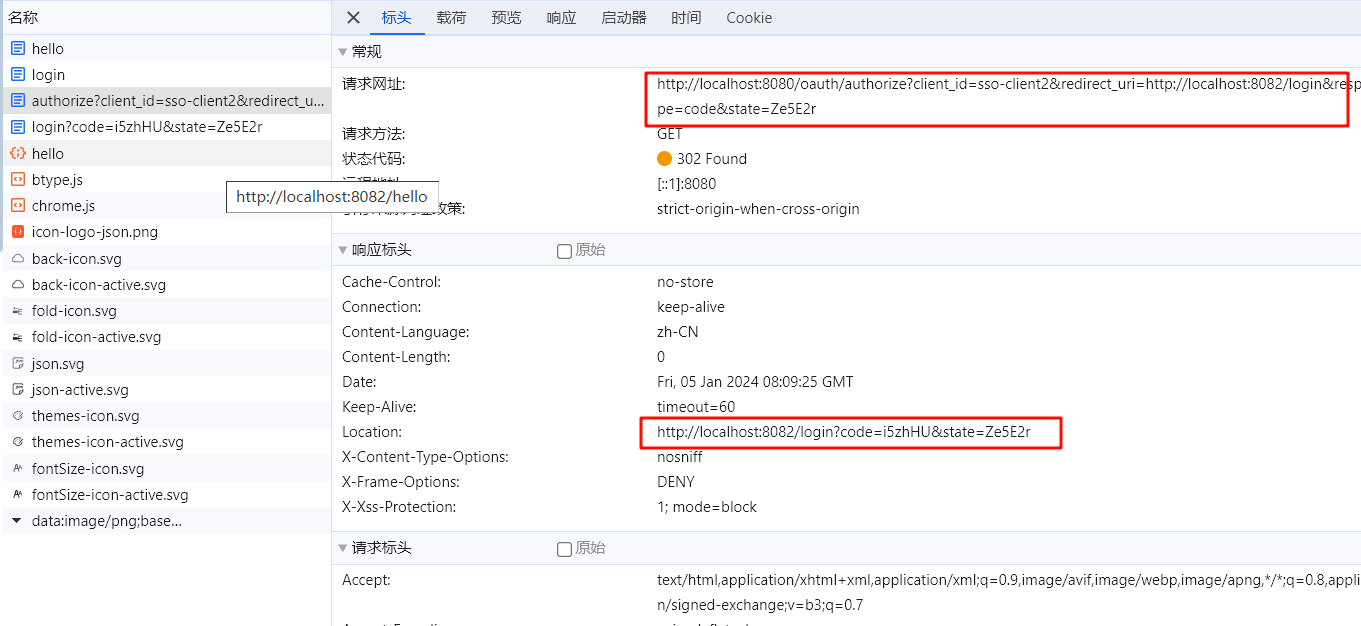
- client2登录接口拿着登录请求执行登录流程,然后重定向到业务接口/hello
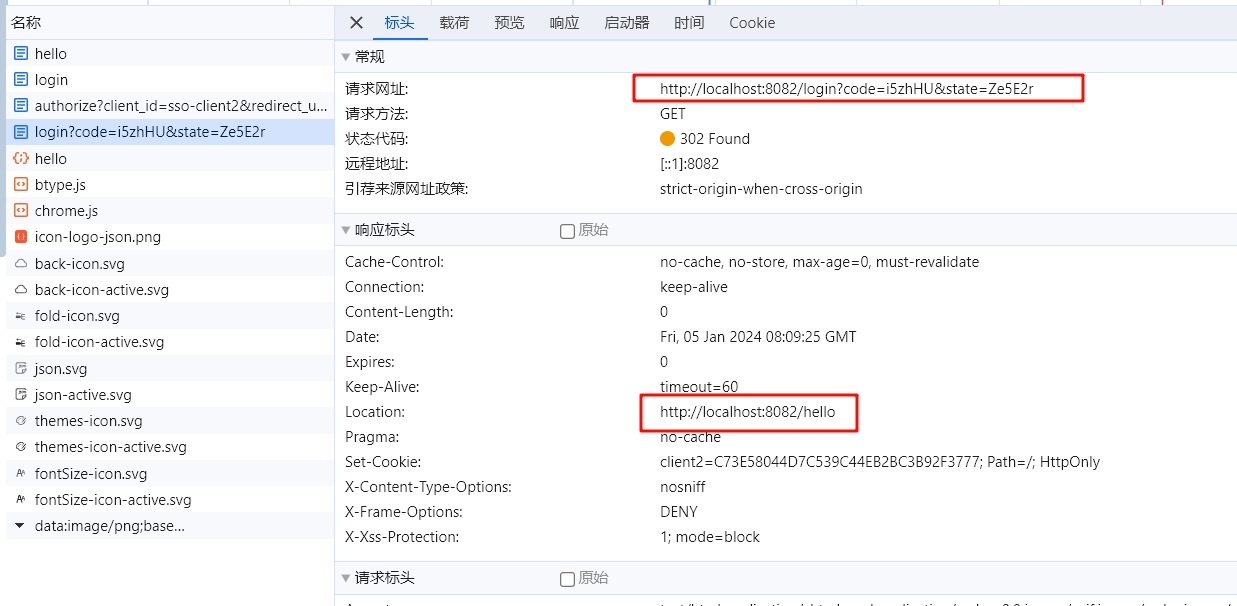
- client执行 /hello接口,完成单点登录

总的来说,客户端1和客户端2的登录流程其实是一样的,都是先重定向到授权服务器拿code,然后再重定向回来继续访问login,完成登录之后再重定向到业务接口
不同之处就是第一次访问授权服务器获取授权码时还要重定向到登录页面进行登录,然后再重定向到授权码接口继续后续。
流程源码解析
// todo 暂时未做